1Overview & getting started
Welcome to CoModel AI. CoModel AI turns your company's data into a living decision model: a deterministic map of how the metrics and decisions in your business influence one another. On top of that model sits an assistant that explains what the model already computed — it never invents numbers or guesses at answers.
The core idea is simple. First you build a model from your own files. CoModel AI discovers the relationships between your metrics, scores how trustworthy those relationships are, and freezes the result. Then you explore it: inspect the influence map, run decision simulations, and ask plain-language questions. Every answer traces back to the deterministic math — so you always know where a number came from.
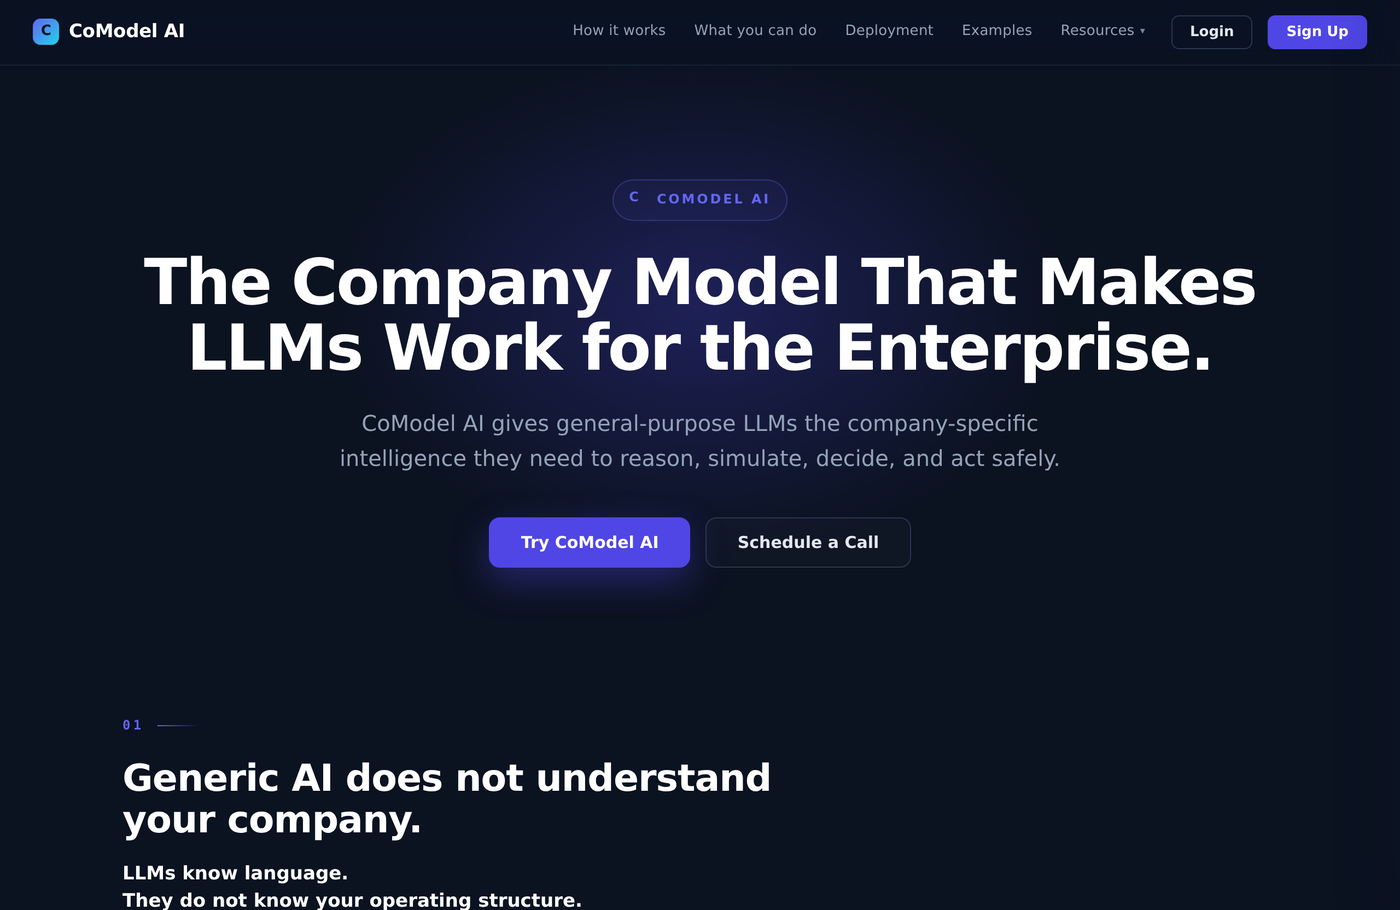
Your journey through the product
- Landing page — learn what CoModel AI does (this is where you are now).
- Sign in — a passwordless one-time-code login gets you into the app.
- Projects home — your grid of models, plus a read-only Sample Model to learn from.
- Build a model — upload your files through the guided New Model Wizard.
- Explore — open a model into the workspace and use its tabs and the Model Assistant.
2Signing in
CoModel AI uses passwordless sign-in. There is no password to remember or leak.
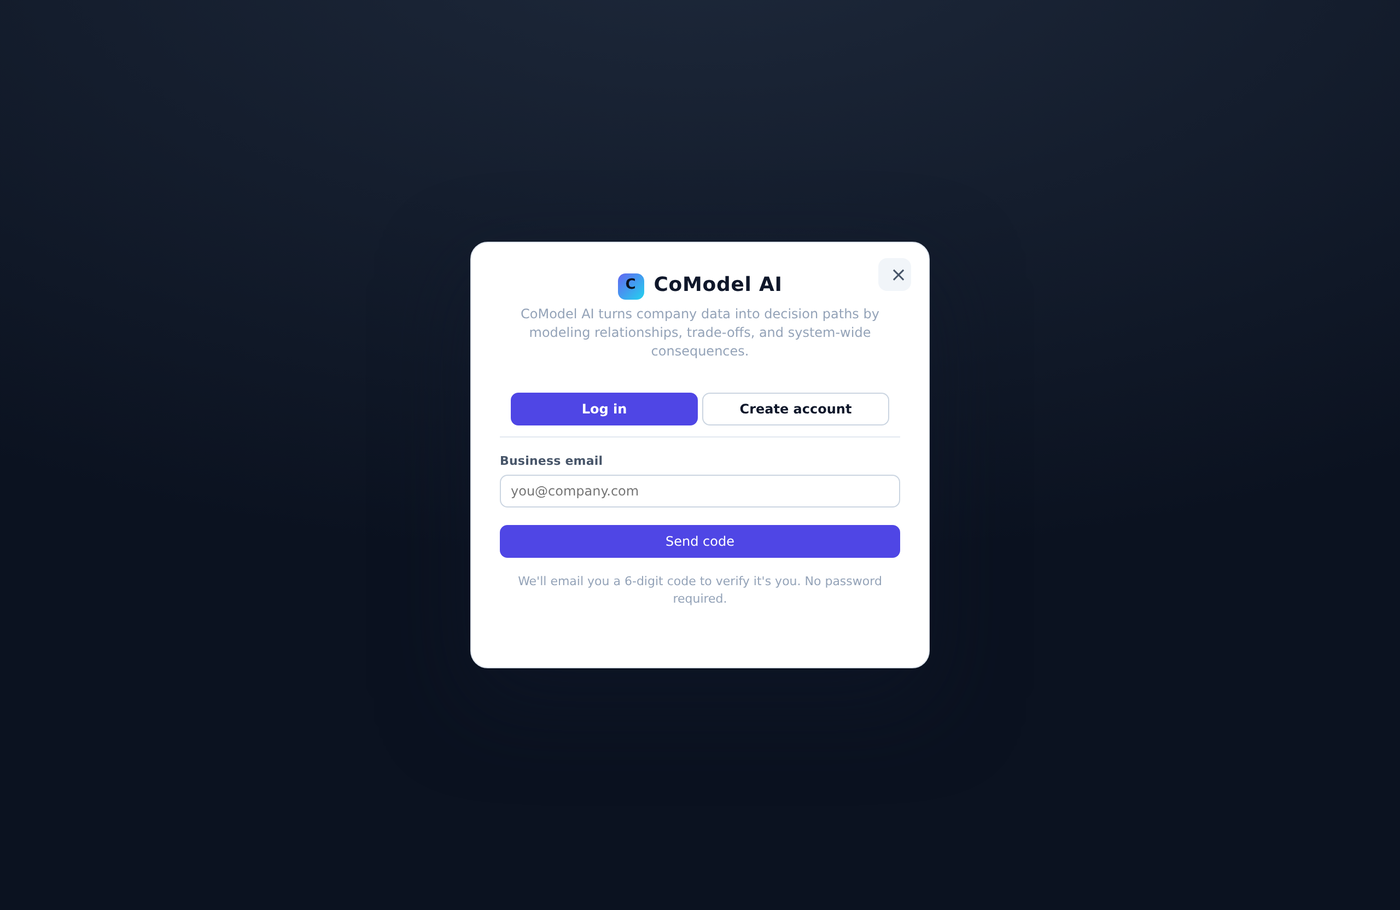
- Click Login or Sign Up on the landing page and enter your business email.
- We email you a one-time code (a short numeric code).
- Enter the code to finish signing in. New emails create an account; existing emails sign in.
- Your session is kept in a secure cookie, so you stay signed in across visits until you log out.
3Projects home
After signing in you land on My HyperIntelligence Models — a grid of every model you own. Each card shows the model's name, its status (draft, built, or published), and quick actions to open or manage it.
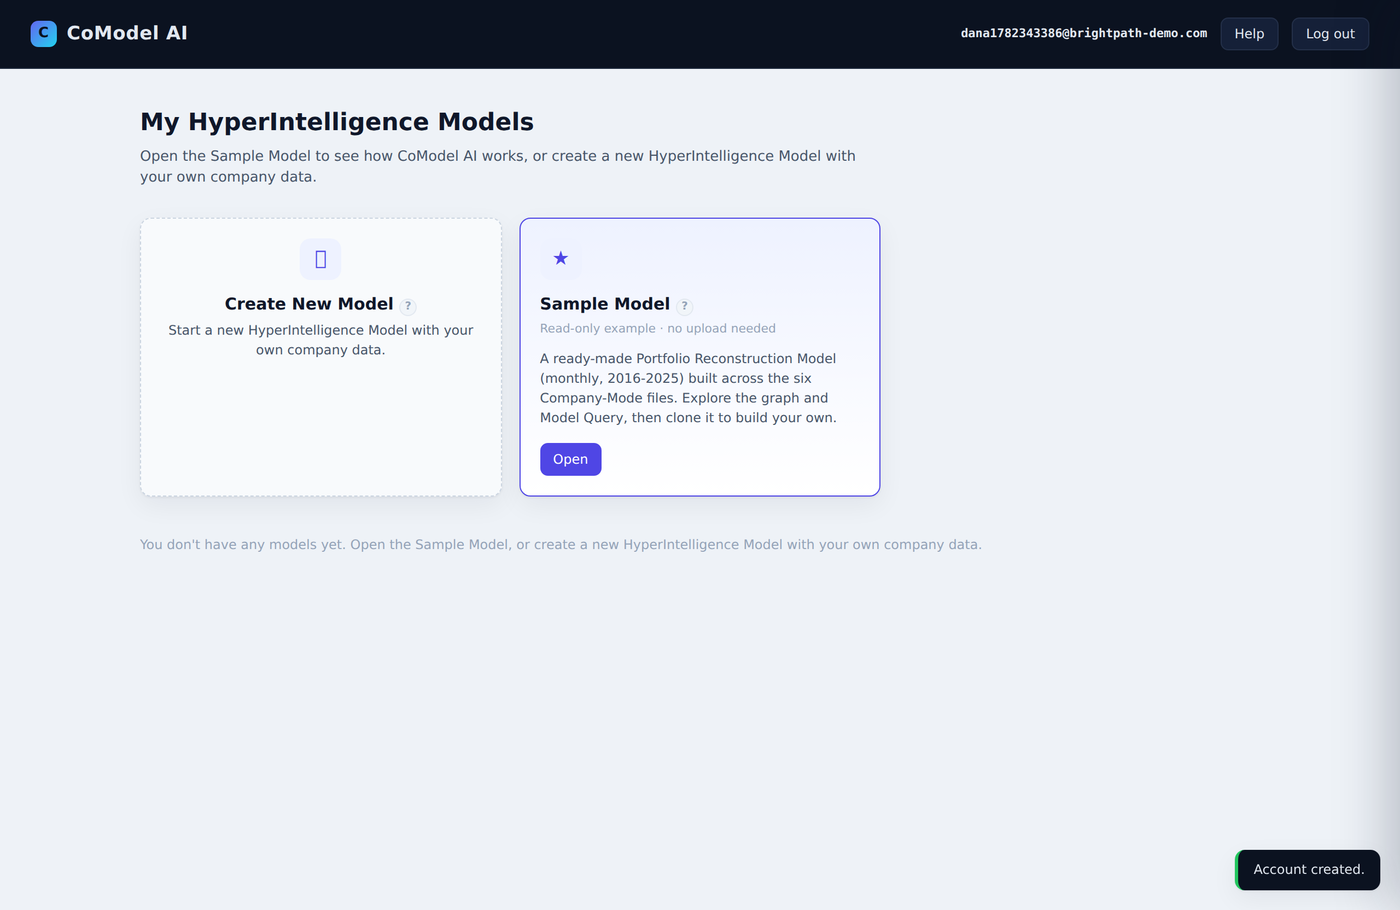
The Sample Model
Every account includes a built-in Sample Model in read-only learning mode. It is fully built so you can explore every workspace tab, the Model Map, and the assistant without uploading any data. You can't edit or delete it — it's there to learn from.
To explore it step by step:
- On the Projects home, find the Sample Model card.
- Click Open to load it into the workspace.
- Click through the tabs along the top, then try the Model Assistant on the left.
Creating a model
Click New Model (or Create a model) to launch the New Model Wizard described in the next section. Once a model is built, it appears as a new card on this grid.
Opening a model
Click a model card to open it into the workspace, where all of its tabs and the assistant live.
4Building a model (New Model Wizard)
The New Model Wizard is a guided, step-by-step flow for turning your files into a decision model. It walks you through identity, uploads, review, and the build.
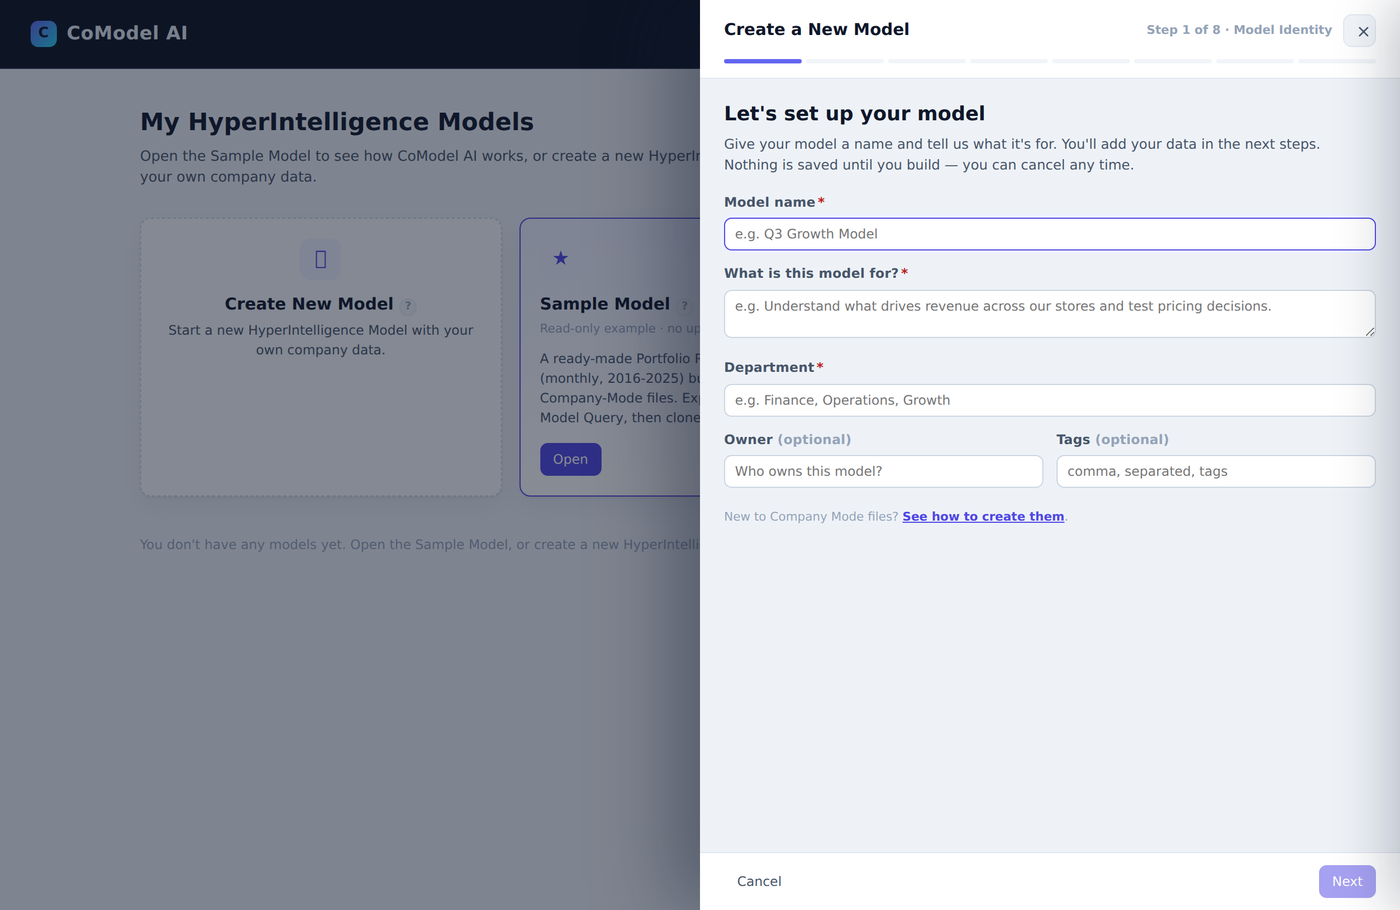
1. Model identity
Give the model a name, a short purpose, and the owning department. This is metadata that helps you and your team recognize the model later.
2. The six-file upload (Company Mode)
A full company model is built from six files. Each one answers a different question about your business:
- Time / Observation Index — the timeline: each row is a point in time the rest of the data is measured against.
- Entities — the things you measure (products, regions, teams, accounts).
- Metric Dictionary — the catalog of every metric: its name, meaning, and type.
- Metric Values — the actual measured numbers for each metric over time.
- Events & Decisions — notable actions and decisions that occurred (used later for richer analysis).
- Business Facts — known rules, objectives, constraints, and levers that govern planning.
3. Review & validation summary
Before building, CoModel AI validates your files and shows a summary: which files were recognized, how many rows and metrics were found, and any problems it found. Structural errors (missing columns, broken references) are flagged so you can fix and re-upload before building.
4. Build
The build step runs the deterministic engine: it discovers the relationships between your metrics, scores their strength and direction, and assembles the influence map. When it finishes, the model becomes explorable in the workspace.
5. Model Maturity & Planning Trust
After building you'll see two readiness signals. Model Maturity reflects how complete and well-formed your data is. Planning Trust reflects whether the model has everything it needs (including approved Business Facts) to safely support decision planning. CoModel AI also lists improvement suggestions — concrete steps to raise both.
Single-File (Demo) upload
In a hurry, or just exploring? The Single-File (Demo) path lets you upload one wide CSV (metrics across columns, time down rows). It builds a model quickly for analysis and exploration, but decision planning (the optimizer) is reserved for full Company-Mode models with approved facts.
5Workspace shell
When you open a model you enter the workspace — the shell that frames every tab and the assistant.
Top navigation
- Brand / Projects — click the CoModel AI logo to return to your Projects home.
- Breadcrumbs — show which project and model you're currently in.
- New Run — rebuild or run the model afresh.
- Load Run — reopen a previous run from this model's history.
- Business Facts — review the rules, objectives, and constraints attached to the model.
- More menu — overflow actions such as exporting the run JSON and opening Help.
- User / Logout — your account menu and sign-out.
Back-to-Models sub-nav
A persistent sub-navigation row gives you a one-click way back to your model grid, so you never lose your place.
Sample Model banner
When you're viewing the read-only Sample Model, a banner reminds you that you're in learning mode and changes won't be saved.
6The workspace tabs
The workspace organizes everything you can do with a model into a handful of tabs. Here's what each one is for.
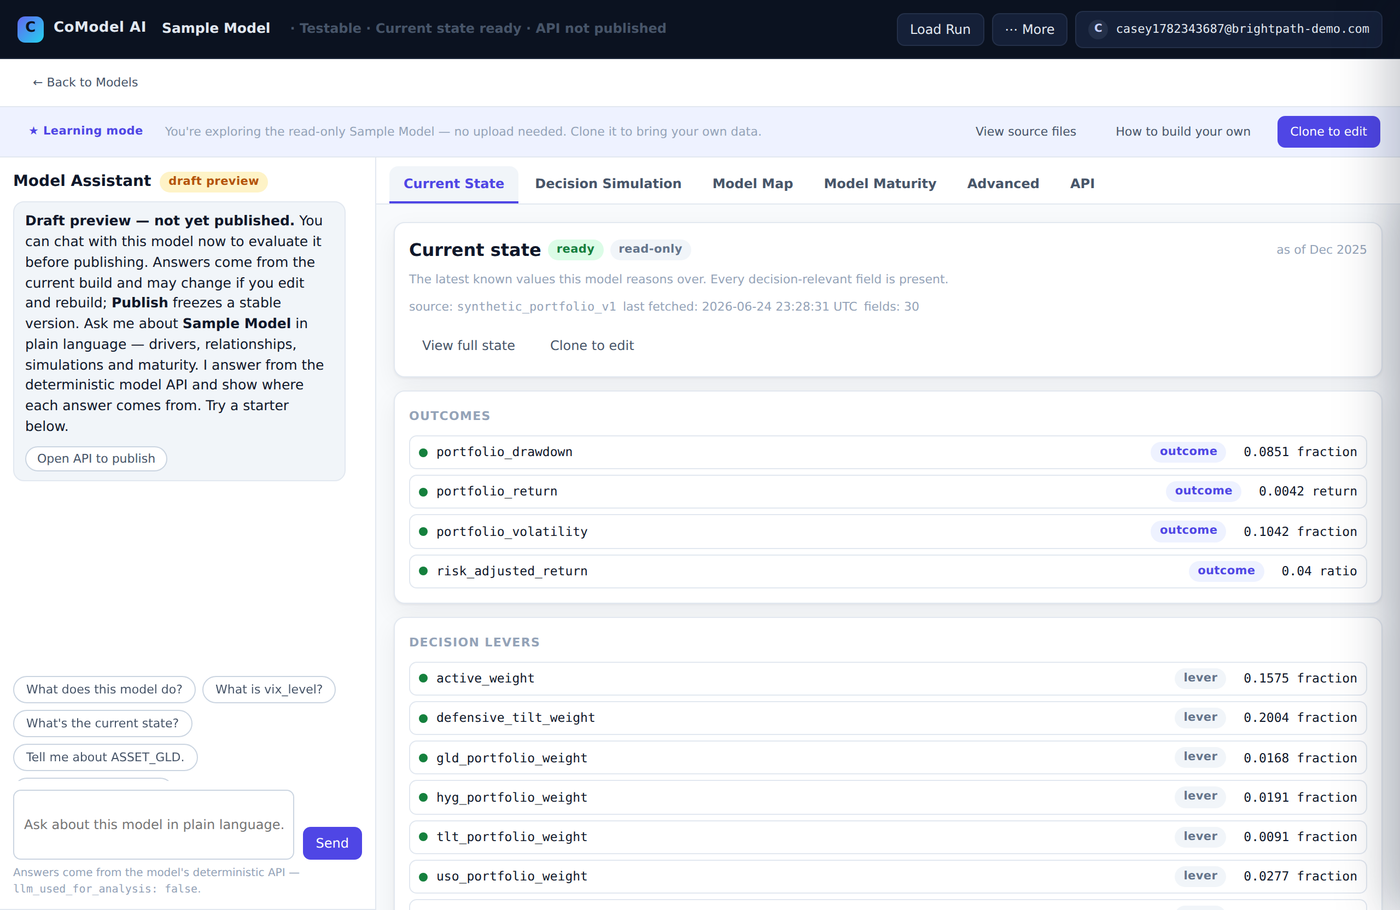
Current State
A live baseline snapshot of your model's metric values — where things stand right now, according to the data you built from. This is the starting point every simulation compares against.
Decision Simulation
Ask what-if questions. Choose a scenario, compare options side-by-side, and read the predicted outcomes for each metric. Every option shows its trade-offs and a Safe / Unsafe guardrail status, so you can see when a choice would violate a known constraint before you act on it.
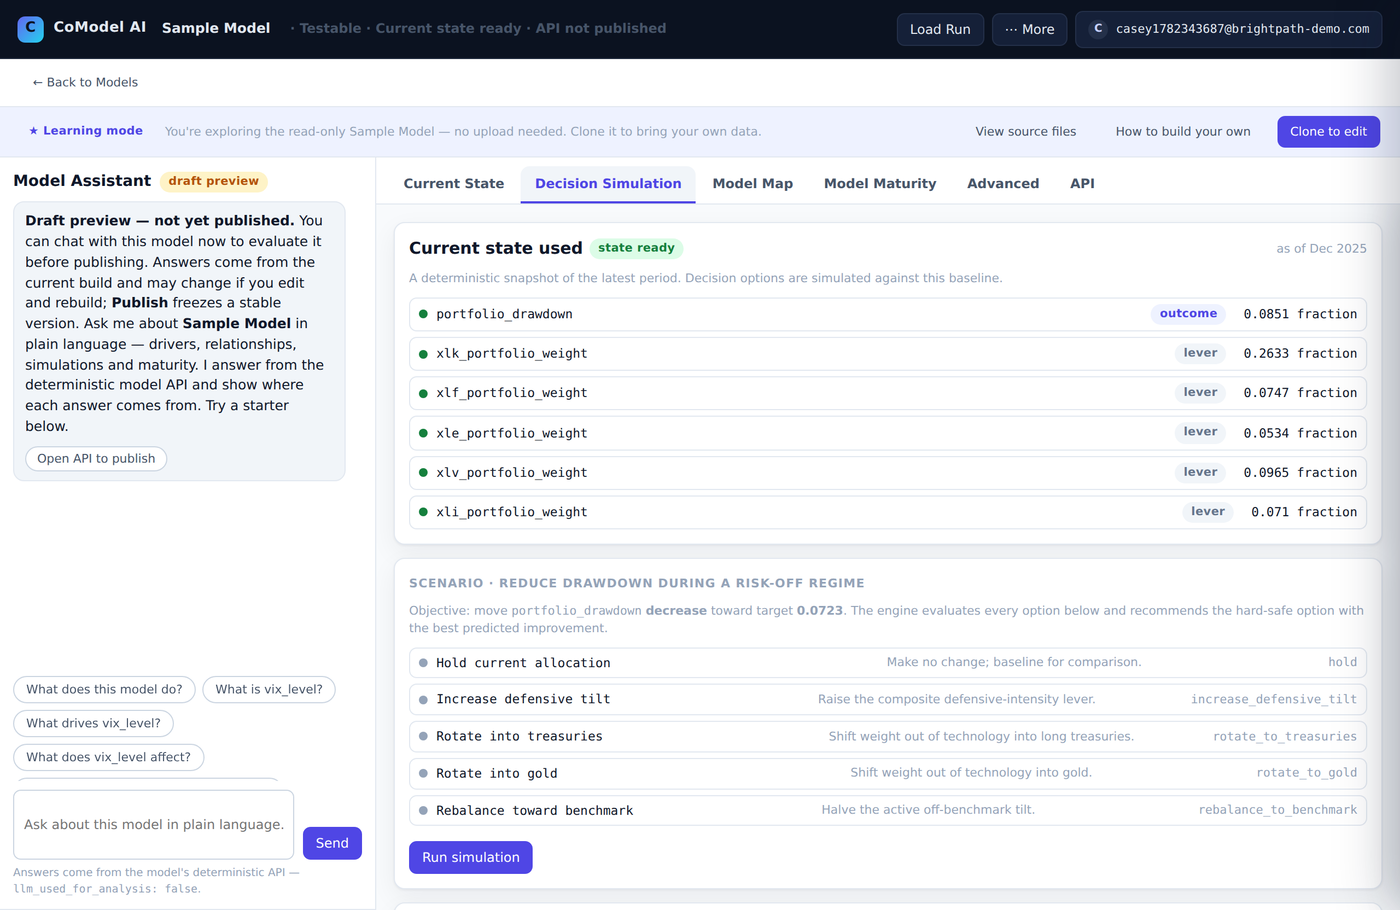
To run a simulation:
- Pick a scenario — the objective being optimized.
- Review the listed options and their trade-offs.
- Click Run simulation to compare the predicted outcome of each option.
Model Map
The heart of the model: the influence graph. Each node is a metric; each edge shows how one metric influences another. Green edges help (a positive influence) and red edges hurt (a negative influence). Edge thickness and opacity reflect the strength and confidence of the relationship.
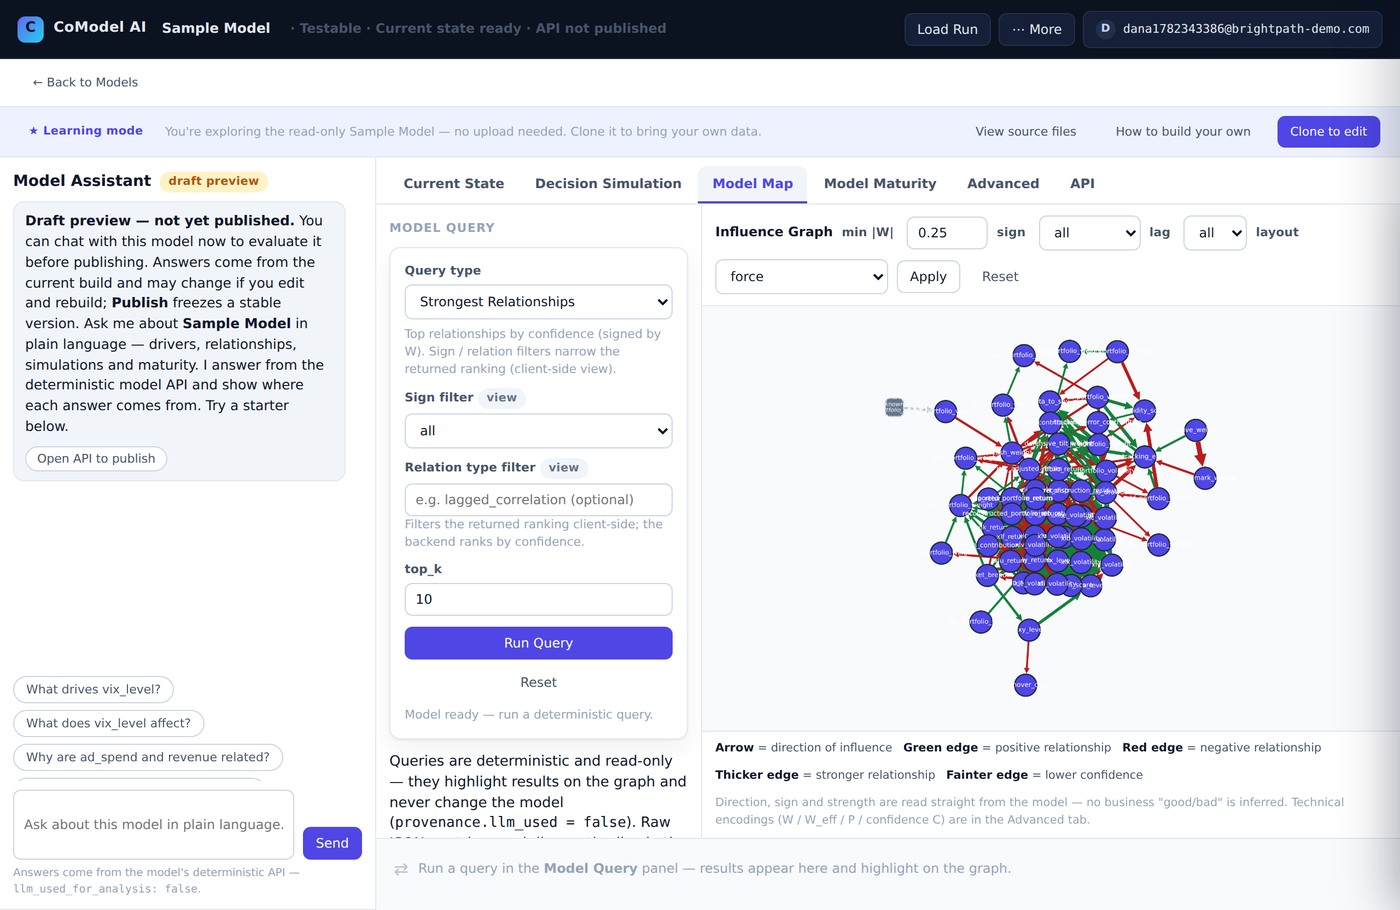
- Toolbar filters — set a minimum |W| threshold to hide weak links, filter by sign (helps/hurts), filter by lag, and switch the layout.
- Query Console — run deterministic questions right on the map: impact-of (what does changing X affect?) and root-cause (what drives Y?). Results highlight the relevant nodes and edges.
- Results / detail panel — the bottom panel shows the query results and, when you select a node or edge, the supporting evidence behind it.
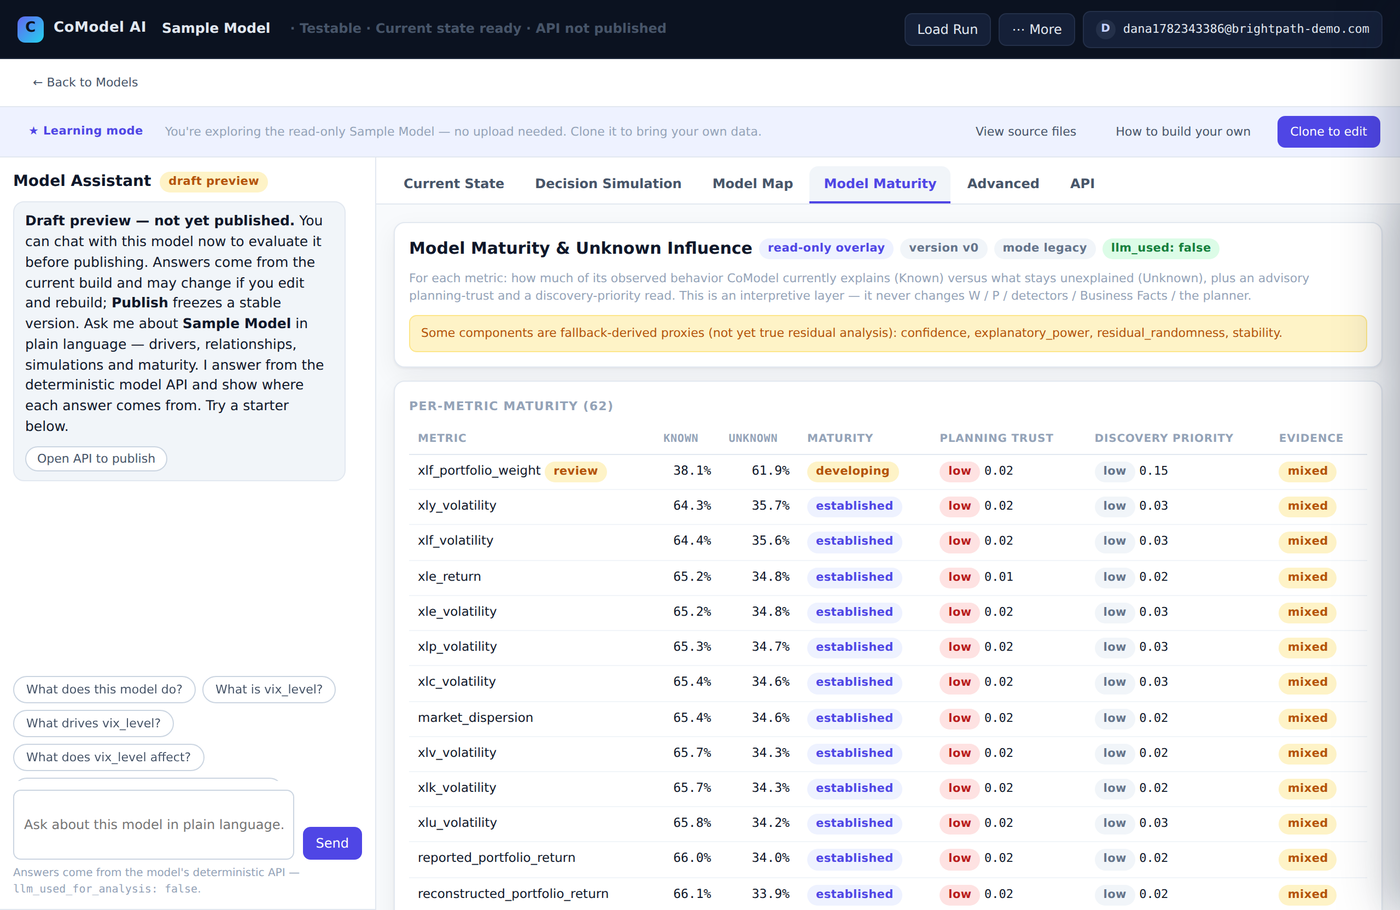
Model Maturity
A readable breakdown of data completeness and model readiness. Use it to understand how much of your business the model can currently explain and what would make it stronger.
Advanced
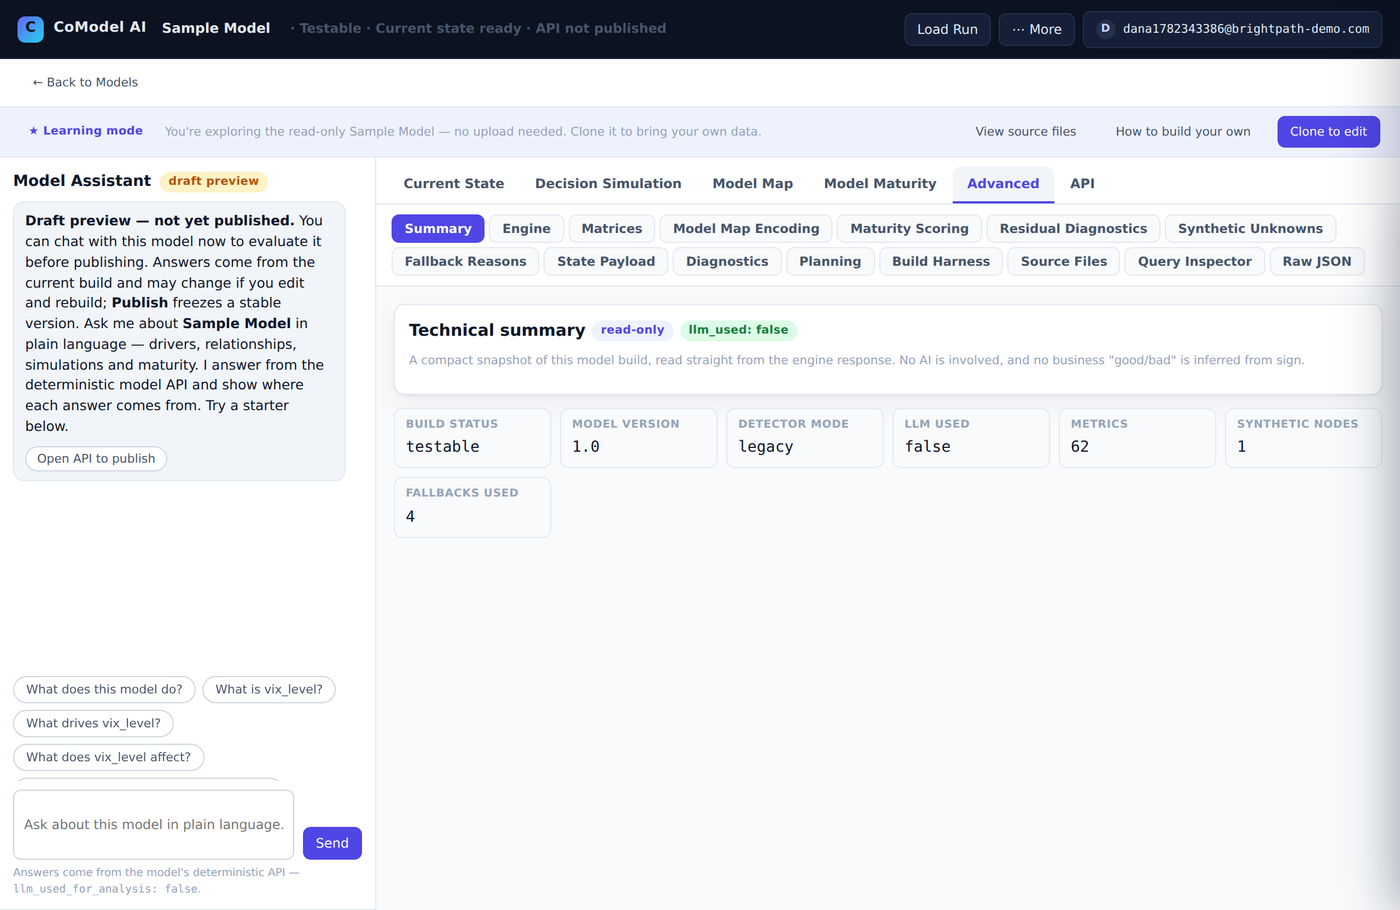
A technical inspector for power users, with sub-tabs such as Summary, Matrices (the raw W / C / P matrices), Diagnostics, Source Files, and Raw JSON. Everything the UI shows elsewhere ultimately comes from this underlying data.
7Goal-Seeking Planner (Monte-Carlo)
The Goal-Seeking Planner lives in Advanced → Planning. Instead of testing one option at a time, you state a goal — move a metric toward a target — and the planner searches for the plan most likely to get you there, ranked by probability of success.
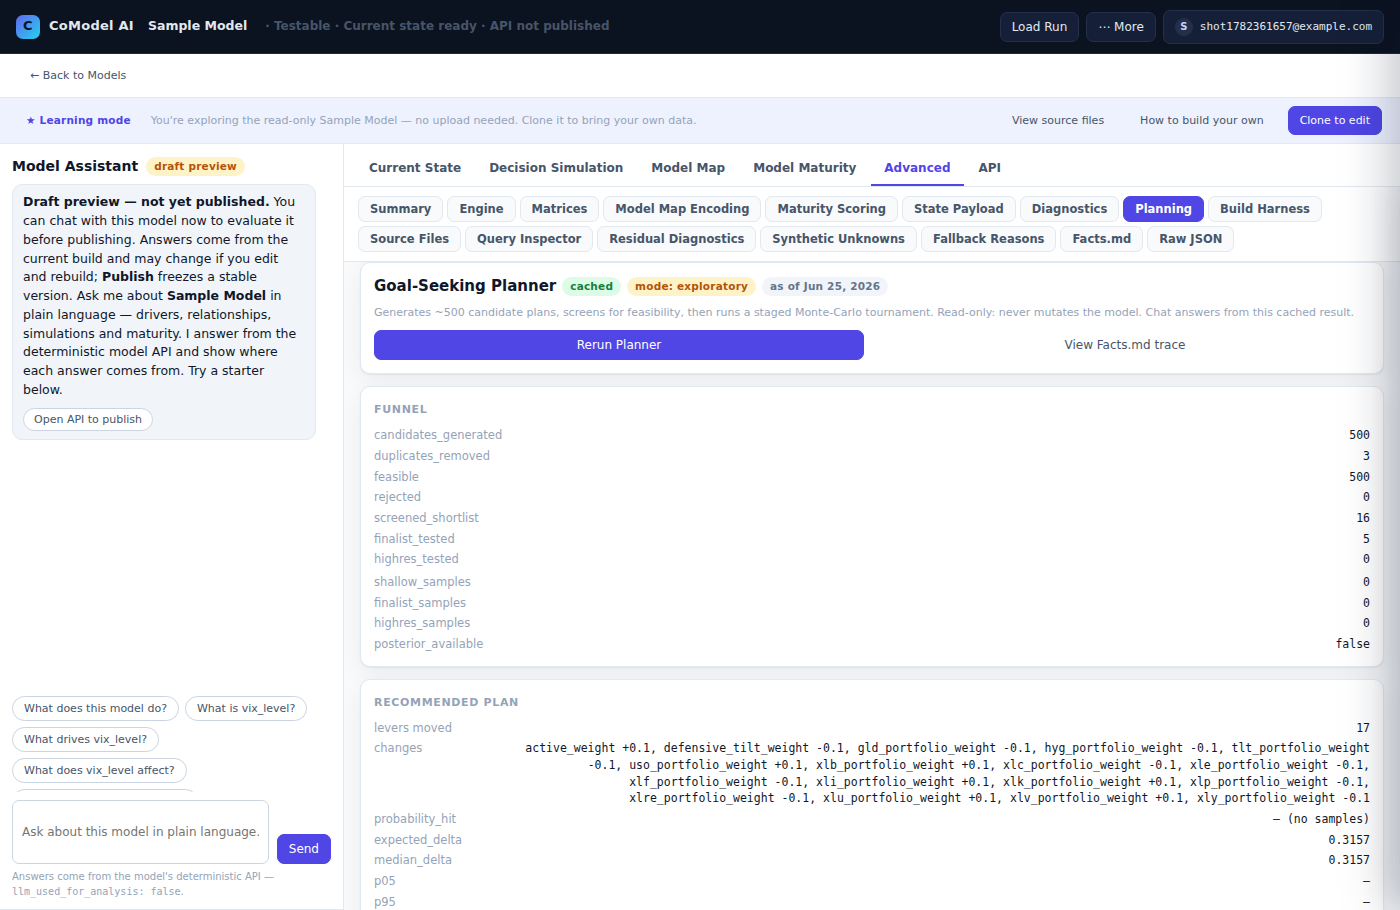
Under the hood it runs a deterministic funnel: it generates around 500 candidate plans, screens them for feasibility against your approved levers and guardrails, then runs a staged Monte-Carlo tournament to rank the survivors. The result is read-only — running the planner never changes the model.
Running the planner
- Open a planning-ready Company-Mode model and go to Advanced → Planning.
- Click Run Planner (it becomes Rerun Planner once a plan exists) and wait for the Monte-Carlo run to finish.
- Read the winning plan, its recommendation status, and the funnel counts that show how many candidates were generated, screened, and rejected.
Stale plans
A plan is computed against a snapshot of your model's inputs. If those inputs change afterwards, the plan is marked STALE — a reminder to Rerun Planner for an up-to-date answer rather than acting on an out-of-date one.
View Facts.md trace
Every plan offers a View Facts.md trace link that jumps to the Facts.md inspector (next section), so you can see the deterministic facts the plan was built from. The Model Assistant answers planning questions from this same cached result.
8Facts.md inspector
The Facts.md inspector is the Advanced → Facts.md sub-tab: a searchable, deterministic read-through of the model's fact graph — the structured statements (relationships, definitions, objectives, levers, and observed values) that everything else in the model is built from.
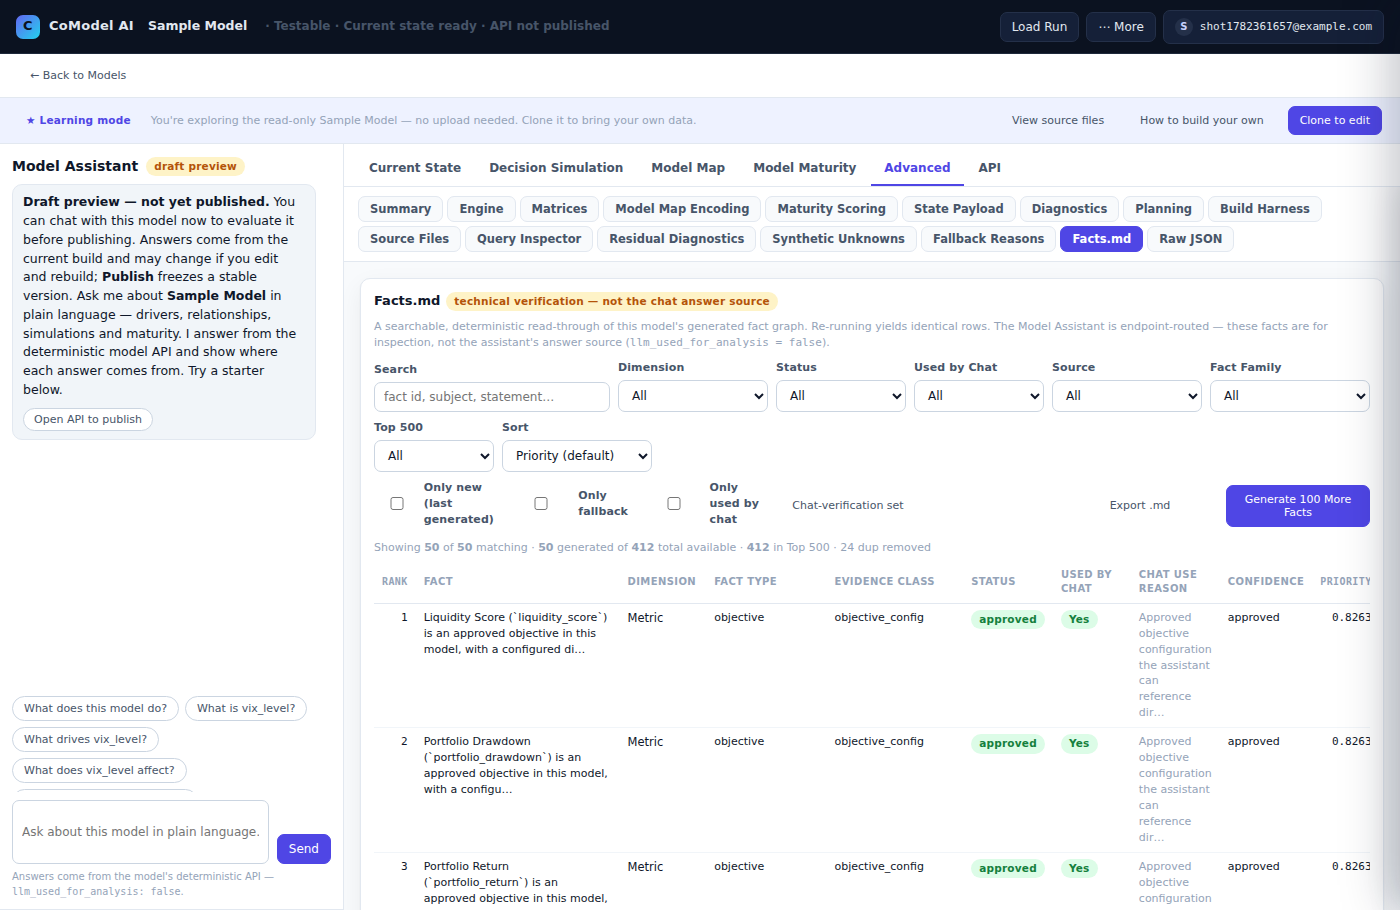
- Search & filter — narrow the table by keyword, dimension, or fact family to find the facts you care about.
- Ranked rows — each fact shows its dimension, type, evidence class, approval status, and confidence, so you can judge how trustworthy it is.
- Export facts.md — download the whole fact graph as a Markdown table (facts.md) to review or share outside the app.
The inspector exists for verification: it lets you confirm what the model knows and trace any answer or plan back to concrete facts. It is a read-through of already-computed data — inspecting it never changes the model.
Used by Chat column simply classifies whether a fact is eligible to ground an answer — the assistant never invents facts.9Model Assistant
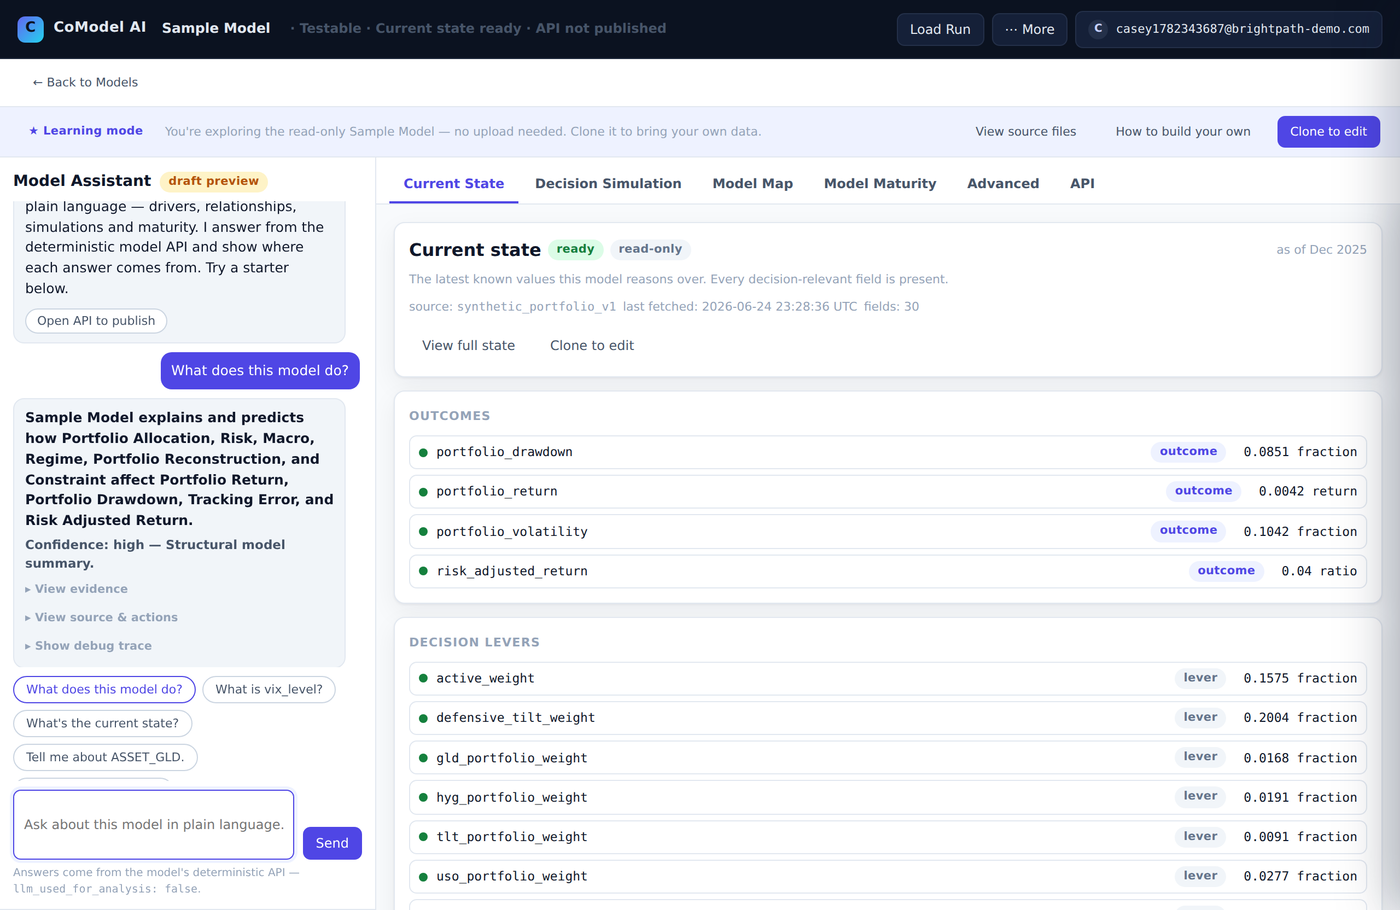
The Model Assistant is the chat panel on the left of the workspace. Ask questions in plain language — "what drives revenue?", "what happens if we raise price 5%?" — and it routes your question to the model's deterministic answers.
To ask a question:
- Open a model, then find the Model Assistant panel on the left.
- Type a question, or click one of the starter prompts.
- Read the answer, then expand View evidence or View source & actions to see where it came from.
Crucially, the assistant never computes or invents results. It interprets your question, picks the right deterministic query, and shows you the answer the model already computed — along with where each answer comes from. If a question is outside what the model supports, it tells you so and suggests what it can answer instead, rather than guessing.
llm_used_for_analysis = false. Any language model only helps route your question and phrase the explanation — it is never the source of a number.